

One of the biggest myths I’ve encountered in the climbing world is thus: that only someone very special can do a pull-up. You have to be an athlete, you have to be born a certain gender, you have to have a certain strength-to-weight ratio—I’ve heard it all. None of it is true.
Sure, there are some factors that might make it harder or easier to get your first rep, but smart, persistent training can often overcome those factors. Below, I’ve included five of the techniques that I’ve suggested to friends, teammates, and to my private coaching students.
I’ve watched many of them get their first free pull-up after just a few weeks of practice!
*Cover photo is me on Brown-Eyed Girl, a climb known for being one of the only famous slabs in the Red River Gorge. I don’t fully remember who took the pic, but I believe it was my dear friend Josie.
Form
You can do pull-ups pretty much anywhere. I’m using my partner’s heavily scotch-taped hand-me-down pull-up bar for the photos in this demo. If you don’t have one of those, though, you can use a (robust) tree branch, any of the various poles on a playground, or pretty much anything else grabbable and horizontal. Most climbing gyms also have pull-up bars.
Once you’ve got a bar, the first step is to get into a strong hang. In a strong hang, your shoulder blades will be engaged and your shoulders will be pressed down and away from your ears.
The further apart your hands are on the bar, the more difficult a pull-up will feel. Spread your hands wide on the bar if you want to put some extra tension on your lats. Otherwise, keep them just a little over shoulder-width apart, especially if you’re still learning.
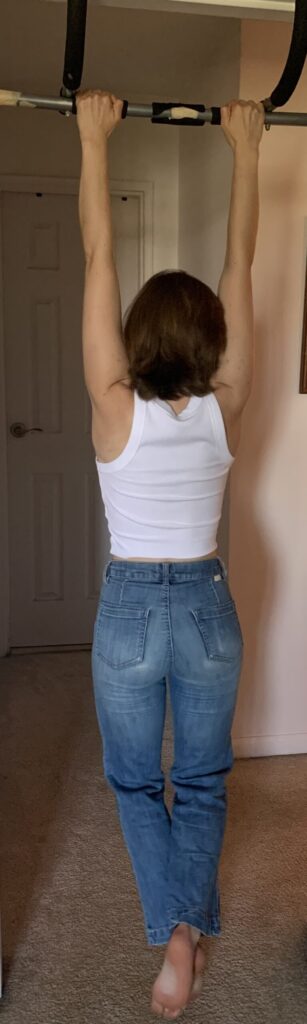
weak hang
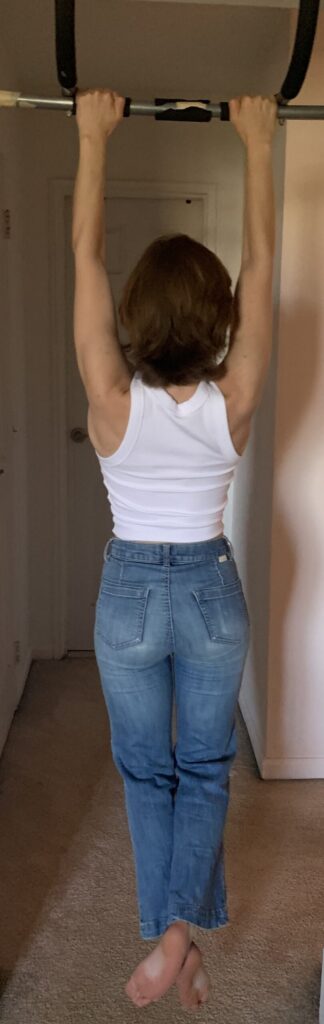
strong hang
Once you’re ready to go, think more about pressing your elbows down towards your ribcage than about hauling yourself into the air—this cognitive reframe can help you maintain your form and focus on the correct movement. Engage your core. I also like to cross my ankles to keep my legs from throwing me off-balance, but that’s totally optional.
You’re not done once your chin clears the bar! Be sure to lower yourself slowly and maintain control on the way down, too, remaining just as engaged as you were on the upwards journey.
Practice Techniques
Assisted pull-ups (bands)
What it is:
Resistance bands are an excellent tool in many circumstances: warmups, PT and recovery, and of course…working on pull-up strength. Pull-up form with resistance bands and without is fairly similar, so using this strategy will help you get comfortable with what it actually feels like to do a pull-up, rather than just building muscle.
Resistance bands come in many strengths (usually indicated by fun colors), which allows you to progressively decrease the amount of help that the band is providing for you. Bands are also much cheaper than a gym membership and can be set up anywhere.
How to do it:
If you’re just starting out, choose a high-resistance band. The higher resistance bands will generally be thicker. Girth hitch the band to the pull-up bar you’re planning to use and pull the loop all the way through. Put one foot (or, optionally, both feet) through the band, grab the bar, and let your weight rest in your hands and the resistance band. With the help of the band, you’ll notice right away that you feel lighter than you would in a free hang.
If you’re of a shorter stature, don’t be afraid to stand on a box to get yourself up there, even if you can reach the bar by hopping. It can be tough to get your foot in the band when you’re already dangling. Once you’re established, bust out your pull-ups with good form.
Assisted pull-ups (machine)
What it is:
The assisted pull-up machine can be found in most gyms and is also a super helpful stepping-stone towards free-hanging pull-ups. I personally don’t like it quite as much as resistance bands: the vibe is just different enough from a free-hanging pull-up to get in the way of practicing ideal form, but is also just similar enough to be a bit confusing when making the transition. However, it does a great job of targeting some of the right muscle groups and allowing you to focus on your upper body.
How to do it:
The assisted pull-up machine looks like a super tall cable rack. Most of them have a step on each side near the bottom, a seat-like apparatus and handles about halfway up (these handles can be used to practice assisted tricep dips), and of course, several grip options near the top.

The machine you’re seeking looks something like this
At the back, you’ll often see a rack of weights. Unlike most gym machines, though, these plates don’t indicate how much weight you’ll be lifting—they indicate how much weight is helping you out. So, setting the pin to a heavier poundage takes that amount of weight off of your arm and back muscles.
Make sure you set the pin to a weight that is less than your bodyweight; otherwise, the seat (and you) won’t move at all! Subtract the weight that the pin is set to from your bodyweight to see how much weight you’ll be moving with your own musculature.
To get going, get a good grip on the bars, and then transfer your weight to your hands as you rest your knees on the seat (facing the back of the rig). When I was practicing my pull-ups on assisted pull-up machines, I would do my first set with a lot of assist, and then gradually lower the weight each set that I did.
Lat pull-downs
What it is:
Lat pull-downs have long been my favorite gym exercise. My own first pull-up came as a total surprise (both to myself and to my friends who witnessed it), but upon reflection, it was probably all the lat pull-downs I was doing that allowed that allowed my silly joke to become an unexpected reality.
There is usually a specific spot for this exercise on any cable rack: a quadrant that has a pulley at the top, a seat, and a cylindrical foam bar for keeping your legs in place.
How to do it:
Cable racks will often have a carabiner from which you can hang any attachment you want. People like to get fancy with lat pull-downs and put all sorts of weird stuff on there, but if you’re training for pull-ups, then a long, standard bar will definitely do. I personally like the ones that angle down at the end.
Attach your bar if it isn’t already there, adjust the foam padding so that your legs are locked in and you won’t go flying, adjust the weight accordingly, and get to it.
If you’re already a pull-up pro, you can still really benefit from this exercise by gradually bumping up to above your own bodyweight. This will prepare you for weighted pull-ups and will add more explosive strength to your climbing.
Progressive free-hanging steps
What it is:
There are lots of things you can do with just your body and a pull-up bar that aren’t quite as challenging as pull-ups, and each of these exercises can bring you progressively closer to being able to do a pull-up. Working on these exercises in this order can help you gradually build the strength you’ll need in your quest.
How to do it:
- Strong hangs
- Bring a stopwatch with you and hang from the bar for as long as you can. To make this a “strong” hang and not just a back stretch, make sure you’re engaging your shoulder blades and focusing on pushing your shoulders downwards. I like to complete three or four sets with ample rest in between each whenever I do these maximum-time strong hangs.
- Scapula pull-ups / shoulder shrugs
- The first several centimeters of a pull-up can be the hardest to master or even imagine. This exercise will help you get used to starting that momentum. Begin in a free hang, squeeze your shoulder blades and lower your shoulders to come into a strong hang, and then release back down. That’s one rep. Try to complete sets of 8-12 reps, and to get to 3-4 sets for the best results.
- Negative pull-ups
- You can start practicing these once you feel more comfortable on the bar and your back and biceps are starting to feel stronger. With your hands established on the bar, jump up so that you are in a locked-off position (elbows bent, chin above the bar—this looks just like the peak height of a pull-up). Now that you’ve jumped into this pose, effectively skipping the first half of the pull-up, slowly lower down, keeping all of the active muscles engaged.
- Lock-offs
- Just like for negative pull-ups, you’ll start each rep by hopping into a locked-off position. However, instead of lowering down, you’ll stay here…for as long as you can. I practice these like strong hangs, hanging until failure and using a stopwatch to track how long I manage.
- Once you can do all of these, the next step is a full free pull-up!
Climb a LOT (and campus!)
What it is:
This is probably the other half of how I got my first (surprise) pull-up. I had just started climbing and was full of beginner stoke, which meant I was at the boulder cave almost every day for two months. Climbing consistently will be enough to make you much stronger than your baseline, especially if you’re not super used to training or lifting weights.
To narrow your session spotlight entirely onto your upper body, try campusing.
How to do it:
There are two good ways to make sure you get lots of climbing in: one, come up with a schedule and make sure you have dedicated days to climb each week, and two, connect with friends who also climb regularly. The latter can motivate you to go even when you don’t want to. Chances are, at least one of you will want to climb on any given day!
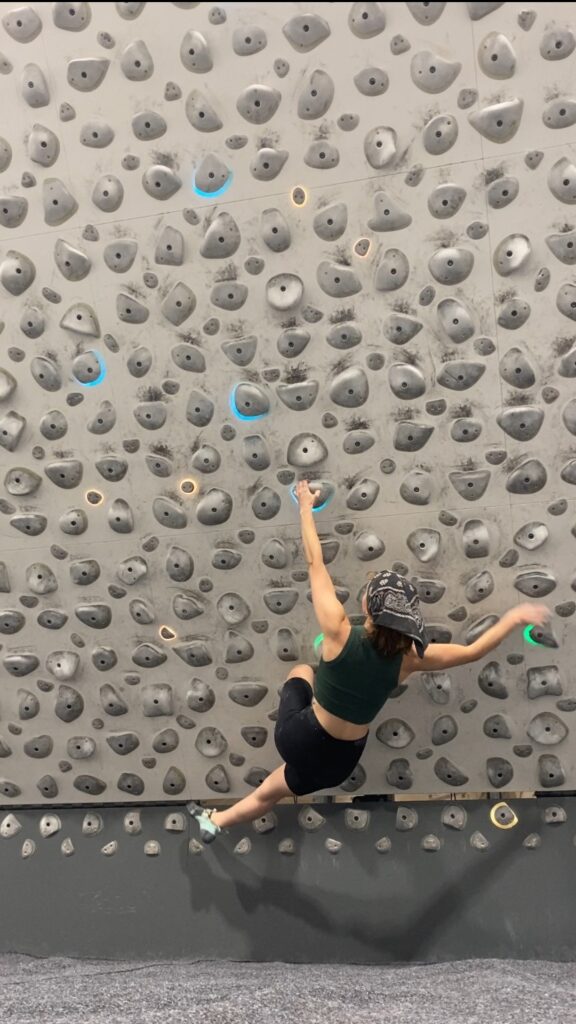
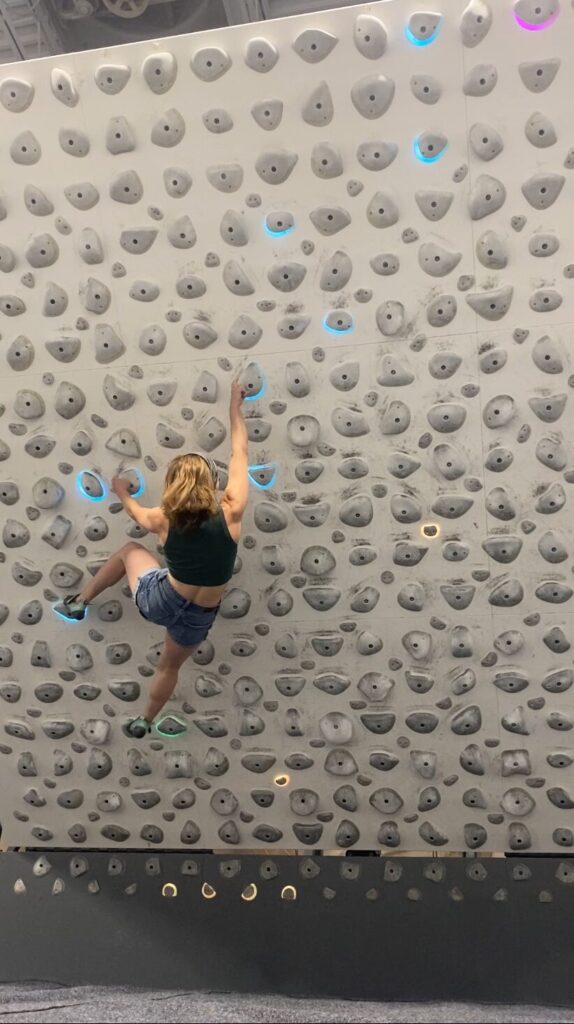
Campusing can be a tough skill to approach, but it doesn’t have to be as hard as some people make it sound. Start on easy, overhanging boulders with holds that are close together. You also can practice traverse-campusing before you attempt to campus straight up a route (this takes slightly less pull strength). I personally like to campus V0-V2 boulders and to invent traverses on spray walls. In general, campusing will get you used to having your weight in your hands, pulling hard without the help of your feet, and engaging multiple muscle groups when you pull.
spending time on the kilter board is a surefire way to get stronger. Many climbing gyms have one these days
Conclusions
The length and ruggedness of the road to your first pull-up will vary from person to person, but the road is always there. Consistency is more important than almost any other skill in this journey. Trust that you’ll get there, and if you keep putting in the work, one day you will.
Even once you’ve gotten that first pull-up, you can always return to these exercises to help you increase your rep count.
Bye for now!
Leave a Reply